Care Instructions with Walkout Statements
When patients have oral surgery or other difficult procedures completed in your office, you often send them home with care instructions. Did you know you can attach those care instructions to specific procedure codes? Then, when you complete that procedure code, the care instructions can be printed along with the walkout statement you generate for the patient.
First, create a document in Microsoft Word that explains any post-visit instructions you want to give to patients. For example, this may include to rinse with a particular wash periodically, to take medication, etc. Since this is a Word document, you may use fonts, graphics or other features of Word as desired.
Note: These instructions are NOT merge letters. Do not use merge fields in the document.
Once you have created your instructions document, save it in your Dentrix letter template folder. If you don't know the location of your Dentrix letter template folder, you can find it in the Office Manager by clicking Maintenance > Practice Setup > Preferences and clicking the Paths tab. The folder listed in the Letter Template Path is where you should save your instructions document.
Once the document is saved, you can attach it to procedure codes in Dentrix.
To attach care instructions to specific procedure codes:
-
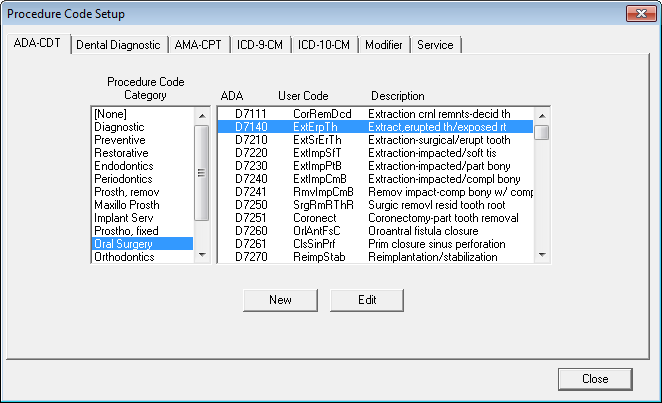
Attach the document to the appropriate procedure code. In the Office Manager, click Maintenance > Practice Setup > Procedure Code Setup. The Procedure Code Setup dialog box appears.
-
Select the appropriate procedure code category and individual procedure code and click Edit.
The Procedure Code Editor dialog box appears.
-
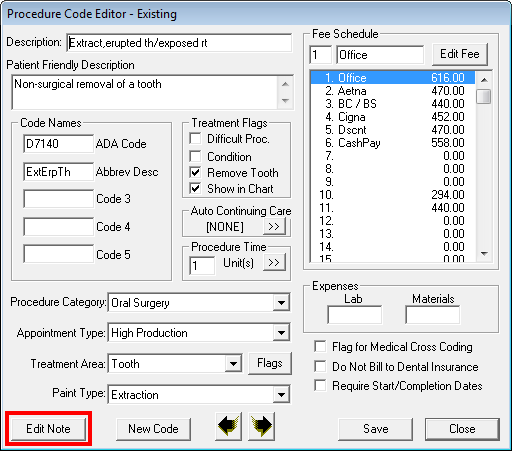
Click the Edit Note button. The Edit Procedure Code Notes dialog box appears.
-
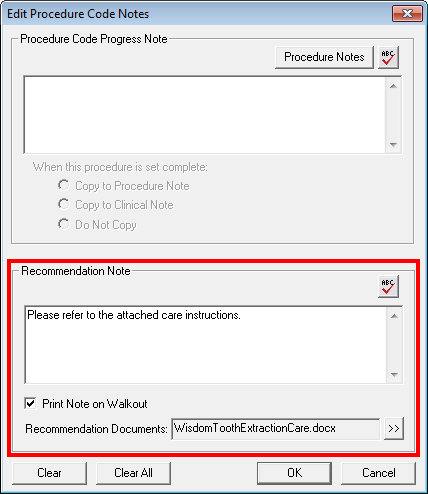
In the Recommendation Note group box, add any additional information not included in your instruction document in the Recommendation Note field and check Print Note on Walkout to include that information when you print a walkout that includes this completed procedure code.
Note: Anything you enter in the Recommendation Note field prints on the walkout statement itself. Recommendation documents print separately. -
Click the Recommended Documents search button. The Recommendation Documents dialog box appears.
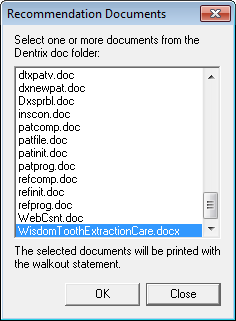
- Select the document you want to attach to the procedure code, then click OK to return to the Procedure Code Editor dialog box.
- Click Save to save your changes.
To ensure that these documents print with a patient’s walkout statement, in the Ledger, from the Print menu, select Walkout. The Print Walkout dialog box appears.
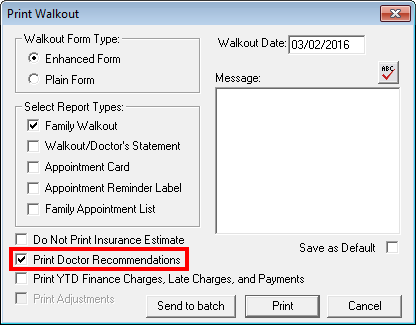
When selecting your print options for the walkout, make sure to check the Print Doctor Recommendations checkbox before printing.
For additional information, log in to the Dentrix Resource Center and search for knowledgebase article #41256, Creating a Doctor Recommendation Note using Microsoft Word.
Author: Sean Eyring, Curriculum Development Specialist
Published: 03/31/2016

 Contact Us
 Phone:
  Email
Email Request Demo