Understanding the Insurance Carrier List
At times you may need to see a list of all patients assigned to an insurance plan in Dentrix, for example when you want to join insurance plans or delete an insurance plan. This information can be found by running the Insurance Carrier List. This list has different options to choose from depending on whether you want to see a list of all subscribers (guarantors) or a list of all insured patients. You can also choose to include the provider IDs associated with the plans.
To generate the Insurance Carrier List:
-
From the Reports menu in the Office Manager, click Reference > Insurance Carrier List. The Insurance Carrier List dialog box appears.
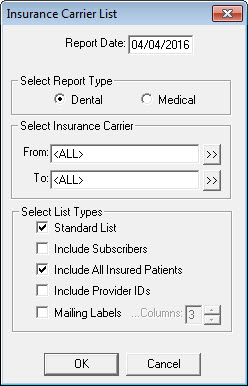
- Enter a Report Date you want to print on the report. The default is the current date.
- In the Select Report Type group box, select Dental to print a list of dental insurance carriers or select Medical to print a list of medical insurance carriers.
- In the Select Insurance Carrier group box, select the range of insurance carriers you want to include. Click the From search button to select a starting carrier and click the To search button to select an ending carrier. To include all carriers, leave both fields set to <ALL>.
-
In the Select List Types group box, select the list type(s) you want to print:
- Standard List – generates a list of each insurance carrier in the range you set
- Include Subscribers – generates a list of each insurance carrier in the range you set, as well as a list of subscribers (guarantors) for each carrier
- Include All Insured Patients – generates a list of each insurance carrier in the range you set, as well as a list of individual insured patients for each carrier
- Include Provider IDs – generates the name, ID code, and ID number of each provider attached to the insurance carrier
- Mailing Labels – generates mailing labels for the insurance carriers. If you select this option, use the corresponding Columns box to set the number of labels across a printed label sheet (1-3)
- Click OK to send the report to the Batch Processor.

Note: Do not select both the Standard List and Include Subscribers or Dentrix will print two lists: one showing carriers and the other showing carriers with subscribers.
Once printed, it’s important to know how to interpret the information on the list. Here’s a quick guide:
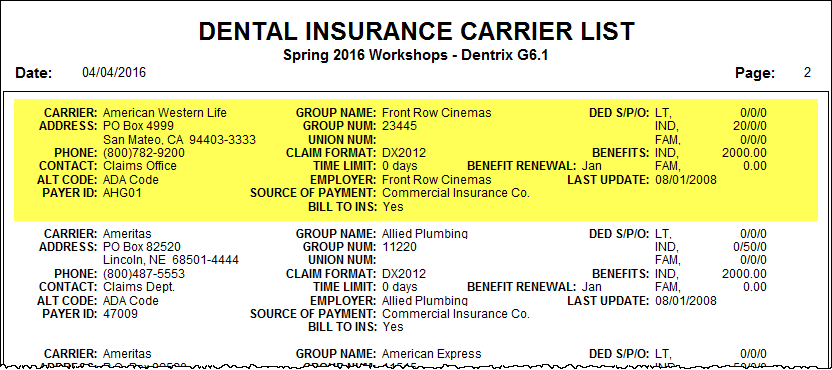
Standard List
Insurance information (highlighted in yellow in the image) is pulled from the Dental Insurance Plan Information and Insurance Coverage dialog boxes used to set up the insurance plan in Dentrix.
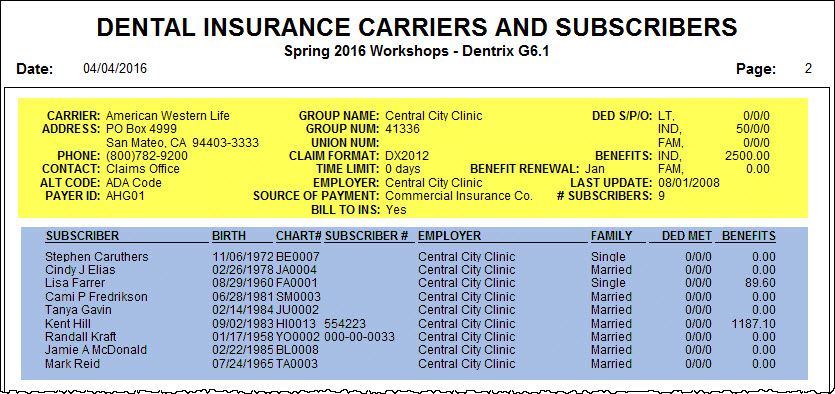
Include Subscribers
Insurance information appears (highlighted in yellow) followed by the name, birth date, chart number, subscriber number, employer, and family status of each subscriber (highlighted in blue). The report also includes the portion of the subscriber’s deductible that has currently been met and the total number of benefits that have been used year-to-date.
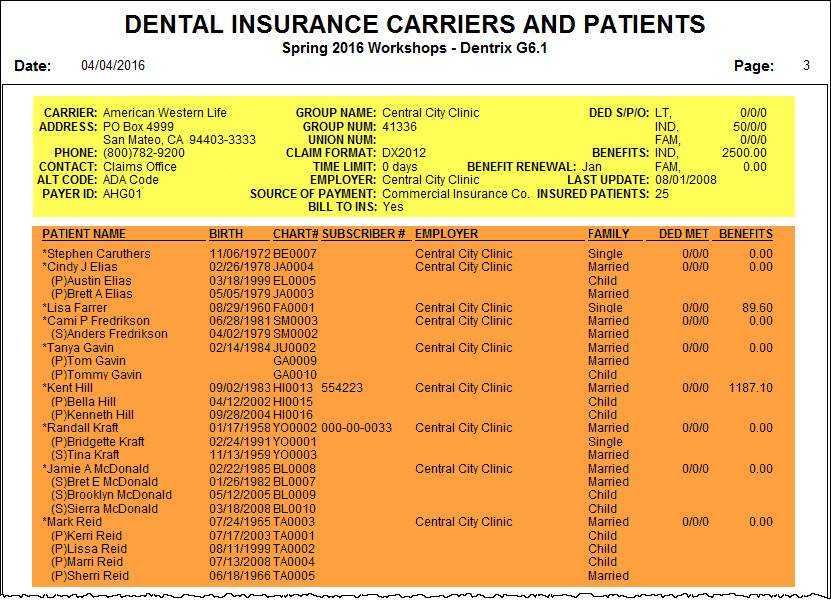
Include All Insured Patients
Insurance information appears (highlighted in yellow) followed by the name, birth date, chart number, employer, and family status of each patient associated with the insurance carrier (highlighted in orange). The report also includes the portion of the patient’s deductible that has been currently met and the total benefits that have been used year-to-date. An asterisk (*) next to a name indicates a guarantor. A (P) indicates primary insurance and (S) indicates secondary insurance.
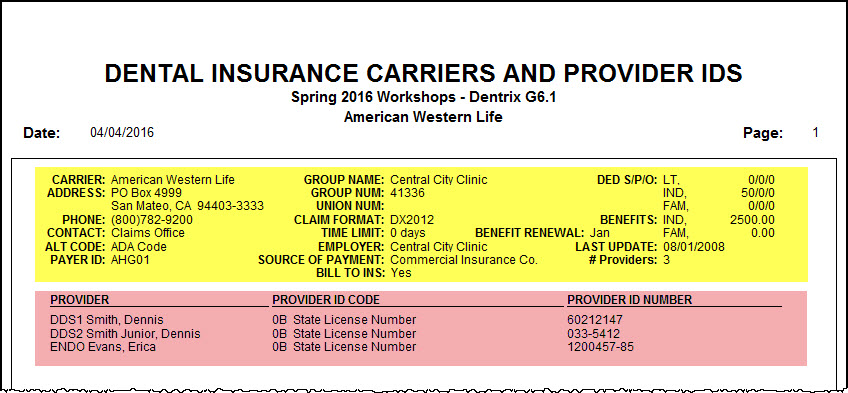
Include Provider ID
Insurance information appears (highlighted in yellow) followed by the name, ID code, and ID number for each provider with an identification code entered for an insurance carrier (highlighted in pink). This information is pulled from the Provider ID Setup dialog box in Dentrix.
For additional information, see the Joining Insurance Carriers and Deleting Insurance Carriers topics in the Dentrix Help.
Author: Sean Eyring, Curriculum Development Specialist
Published: 07/31/2016

 Contact Us
 Phone:
  Email
Email Request Demo