Continuing Care Appointment Reminder Cards
It's important to keep your hygiene schedule full. Regular cleanings promote a healthy mouth for patients, and much of the practice's production is diagnosed during hygiene visits. Because of this, it is important to connect with your patients, and one way to do that is through a reminder postcard.
In order for Dentrix to recognize that a patient has continuing care, a continuing care type must be assigned to the patient. You can assign a continuing care type either directly through the Family File or by having an appointment with a continuing care initial reason where the Use Reason to Auto Update CC was checked in the Appointment Information dialog box.
In Dentrix G6 and later, you can generate a list of patients due for continuing care reminders using the new List Manager.
To generate continuing care reminder cards using the List Manager:
- From the Office Manager, select Letters & Custom Lists. The Letters & Custom Lists panel appears.
-
Select Continuing Care. The Continuing Care Letters & Custom Lists dialog box opens.
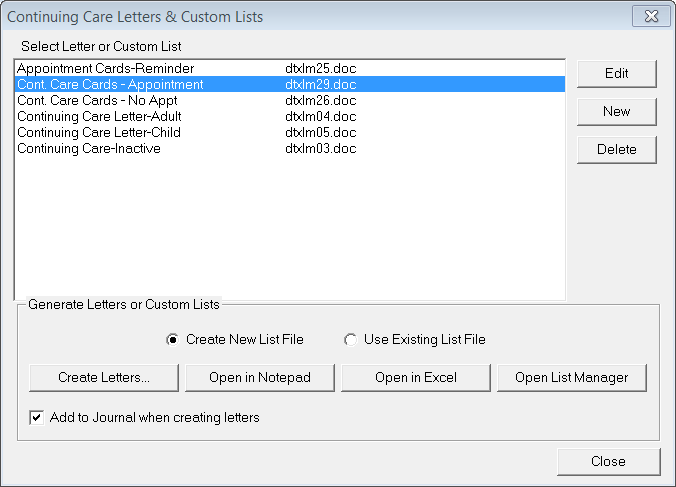
- Click to highlight Cont. Care Cards - Appointment.
-
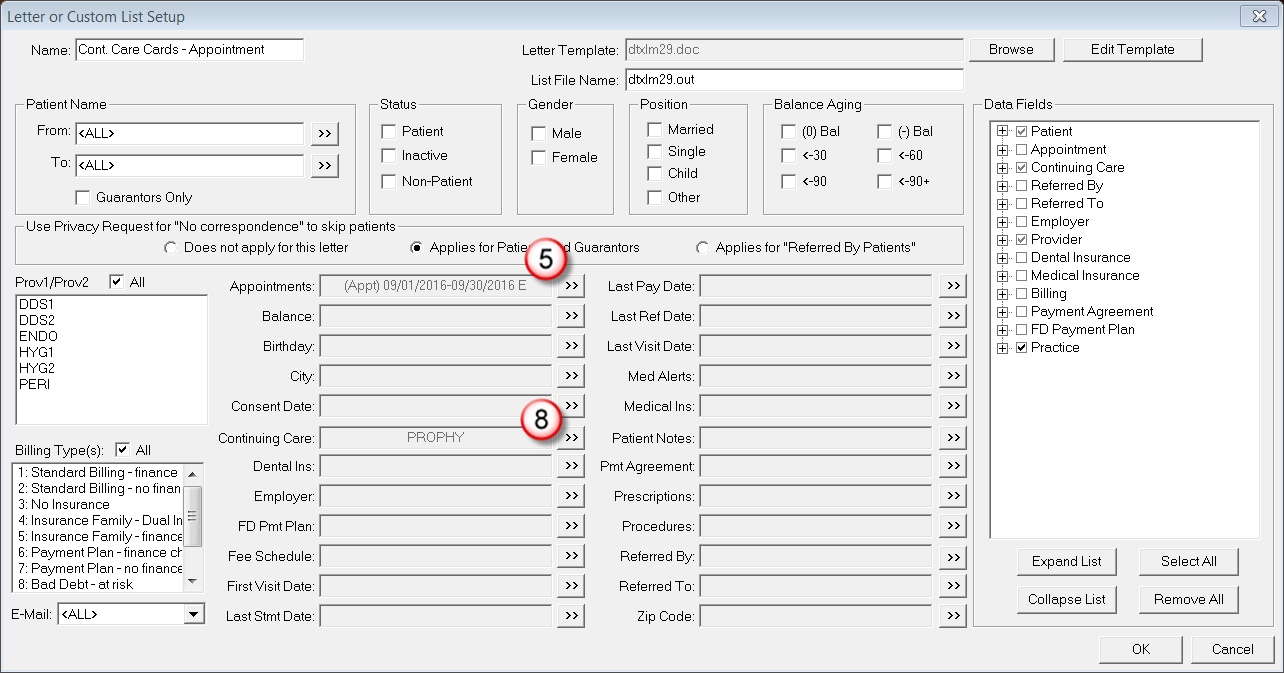
Click Edit to open the Letter or Custom List Setup dialog box.
-
Click the Appointments search button. The Select Appointment Range dialog box appears.
-
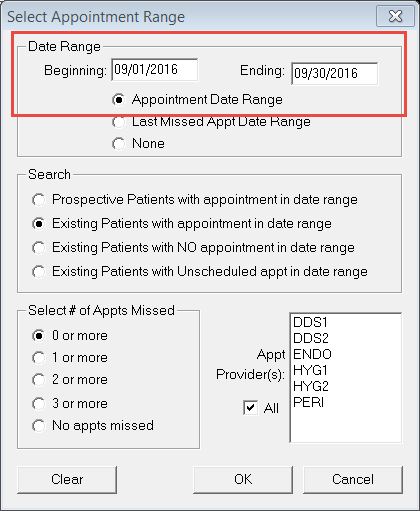
In the Date Range group box, set a date range for the appointment dates using the Beginning and Ending fields. Make sure Appointment Date Range is selected. The date range should be far enough ahead of today’s date to allow you to send out your postcards before the first of the appointments are actually due.
Note: You can filter your patients by additional criteria. For example, if you only want to create postcards for one provider’s patients, select that provider in the Appt Provider(s) field. - Click OK to return to the Letter or Custom List Setup dialog box.
-
Click the Continuing Care search button. The Select Continuing Care Ranges dialog box appears.

- In the Continuing Care Type group box, select the continuing care types you want to send reminders for. Only patients with the selected types assigned will have postcards created.
- Verify that the Due Date range fields are empty. While many of your scheduled patients may be due in the same month as their appointment, there will be some patients who are coming in overdue for an appointment. By leaving the Due Date range empty, Dentrix will include the patients whose due date is not in the same date range as their appointment.
- Leave the Prior Treatment range fields empty. This option will limit the reminder card list to patients who last came in for the selected continuing care types during the date range specified. By leaving the Prior Treatment range empty, Dentrix will include patients who have been assigned to continuing care but have yet to come in for their first appointment.
-
In the Include group box, select With Attached Appointment.
Note: By selecting With Attached Appointment, you ensure that the text printed on the reminder postcard will make sense. The dtxlm29.doc template contains merge fields that include appointment details. - Click OK to return to the Letter or Custom List Setup dialog box.
-
Set other filters as needed, and then click OK to return to the Continuing Care Letters & Custom Lists dialog box.
Important: The Letter or Custom List Setup dialog box remembers the settings that were last used. Before you exit the dialog box, look over the fields to make sure no unexpected filters are selected. - Click Create Letters to launch Microsoft Word and generate personalized reminder postcards for patients that match the filters you just set.


After you create the merged cards, do not save changes to the file with the patient information in it when you exit Word. Otherwise, it will overwrite your template and you will not be able to merge new cards in the future.
You can automate the postcard reminder process using the Dentrix eCentral Communication Manager. Go to www.dentrix.com/ecentral for more information.
For more information on this topic, read Article #15075 How To Generate Recall/Continuing Care Cards (With Or With Out Appts) in the Dentrix Resource Center. For more information about assigning continuing care through an appointment, read Article #16369 “Use Reason To Auto Update CC” Option.
Bonus Tip: You can easily adapt these steps to create reminder cards for patients without an appointment. In the Continuing Care Letters & Custom Lists dialog box, highlight Cont. Care Cards – No Appt. and omit the Appointments range search in the Letter or Custom List Setup dialog box. Select Without Attached Appointment in the Select Continuing Care Range dialog box.
Author: Joel Baldwin, Curriculum Development Supervisor
Published: 02/29/2016

 Contact Us
 Phone:
  Email
Email Request Demo