Backing Up Your Dentrix G5 Database
Henry Schein is pleased to announce the release of Dentrix G5. G5 stores information in an SQL database, which significantly improves the speed of data access and overall performance and product stability.
Because of this new database structure, in Dentrix G5 the Dentrix database location has been moved to
Important: If you are upgrading from a previous version of Dentrix, your old backup configuration will no longer be valid.
While it is important to back up all your important computer files, it is critical that you back up your important Dentrix database files in the Common folder, at minimum. Any data you choose to not back up cannot be restored in the event of data loss. For an in-depth look at the types of files contained in the Common folder, please see Backing Up the Dentrix G5 Database, available at www.dentrix.com/g5 under Installation Help.
You can update the files you want to back up by exporting a copy of your live database manually or by scheduling recurring exports to happen automatically with the Dentrix Server Administration Utility. The Dentrix Server Administration Utility is used to schedule an export of your Dentrix database.
Due to the nature of an SQL database, the Dentrix database server locks its database even when Dentrix is not open on any computer on your network (because the Dentrix ACEServer service is always running on the server). In order to back up the active database files, the database must be exported to a location where your backup software can back up a copy of your database.
To schedule a database export:
- Close all Dentrix modules on all computers on the network.
-
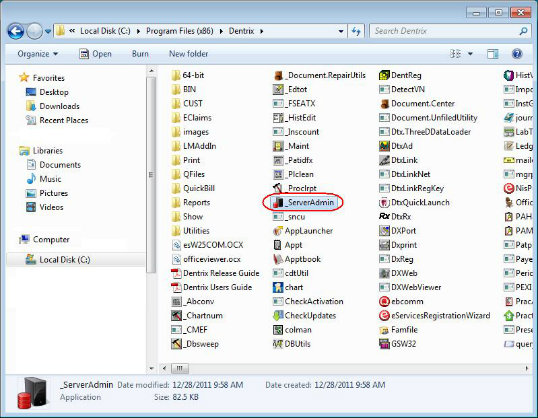
On any computer, locate and double-click the executable for the Dentrix Server Administration Utility. The default location for the utility is C:\Program Files\Dentrix\_ServerAdmin.exe.
Note: If you are using Windows Vista or Windows 7, the utility will be located at C:\Program Files (x86)\Dentrix\_ServerAdmin.exe
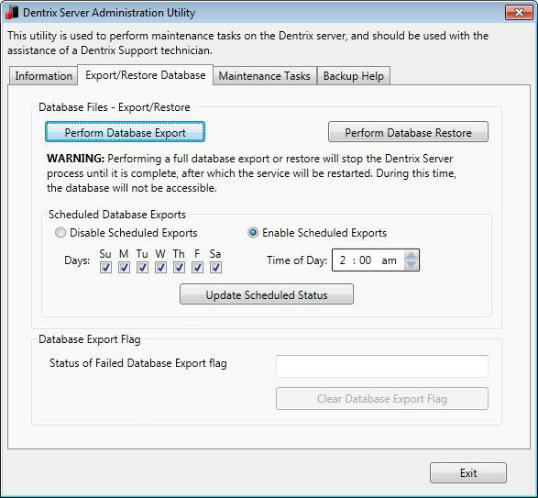
- Click the Export/Restore Database tab to see Export/Restore options.
-
Under Scheduled Database Exports, select Enable Scheduled Exports.
-
Set up the following options:
- Time – Enter the time you want the export to occur.
- Days – Select the checkboxes that correspond to the days of the week you want the export to occur.
- Click Update Scheduled Status to save the export schedule.


The export will start at the specified time on the selected days until you disable this feature. The length of time required to make a complete copy of your database depends on the size of the database (the number of patients, transactions, claims and so forth).
To learn more about how to back up your Dentrix G5 database, visit www.dentrix.com/g5, click the Installation Help link, and open Backing Up the Dentrix G5 Database.
If you have a current Customer Service Plan, you have 5 GB of free storage space available with eBackup. For more information about eBackup, please visit Dentrix eBackup.
Learn about upgrading to the latest version of Dentrix.
Author: Sean Eyring
Published: 03/22/2012

 Contact Us
 Phone:
  Email
Email Request Demo