Deleting Unused Insurance Plans in Dentrix
It happens. You are entering insurance information in Dentrix for a new patient, and as you scroll through the list of insurance plan names one catches your eye and you think, “We haven’t accepted that insurance in forever.”
No one really likes clutter, do they? To keep your Dentrix database uncluttered, you may at times want to delete insurance plans you no longer accept.
Dentrix only allows you to delete insurance plans when 1) they don’t have subscribers attached, and 2) all claims for the plan have been received. To find out whether an insurance plan meets those two criteria, you should first run the Insurance Carrier List to find patients attached to the plan, and then run the Insurance Aging Report to find out if there are any outstanding claims attached that would prevent you from deleting the plan.
It’s worth noting that Dentrix uses the word “purge” as an equivalent to “delete” with regards to removing an insurance plan.
To purge an insurance plan:
-
Run the Insurance Carrier List to see a list of patients attached to each insurance plan:
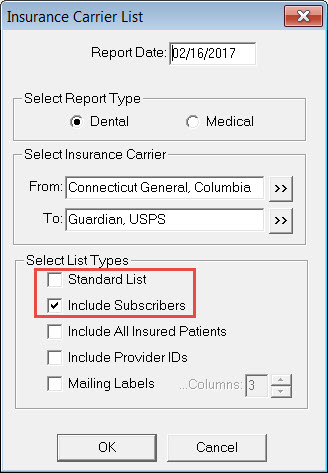
- From the Office Manager, click Reports > Reference > Insurance Carrier List.
-
Select the desired insurance group range. Uncheck Standard List, and check Include Subscribers. Click OK.
-
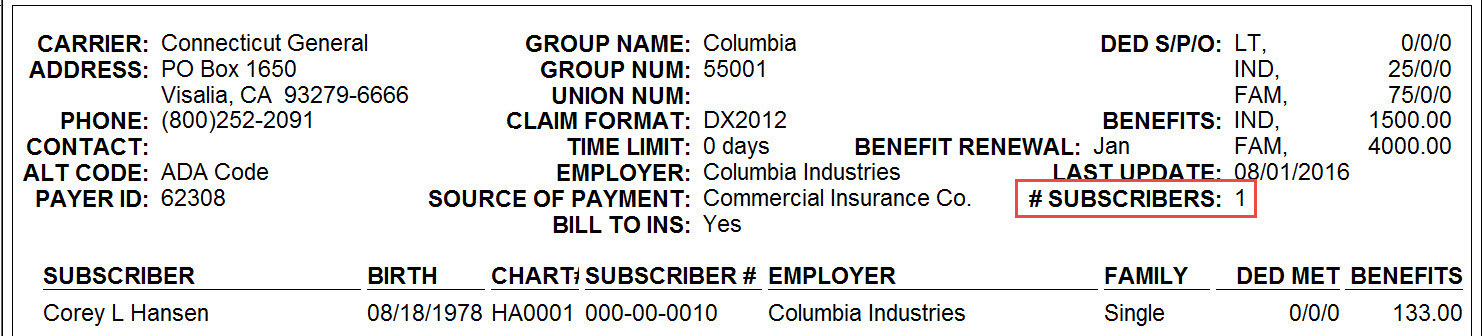
In the Batch Processor, view or print the Dental Insurance Carriers and Subscribers list. If an insurance plan is not attached to any patients, the # Subscribers section of the list will be zero. If there is a number in the # Subscribers section, the subscribers are listed.
-
As needed, clear the insurance plan attached to patients:
- From the Family File, select a patient from the Insurance Carrier List.
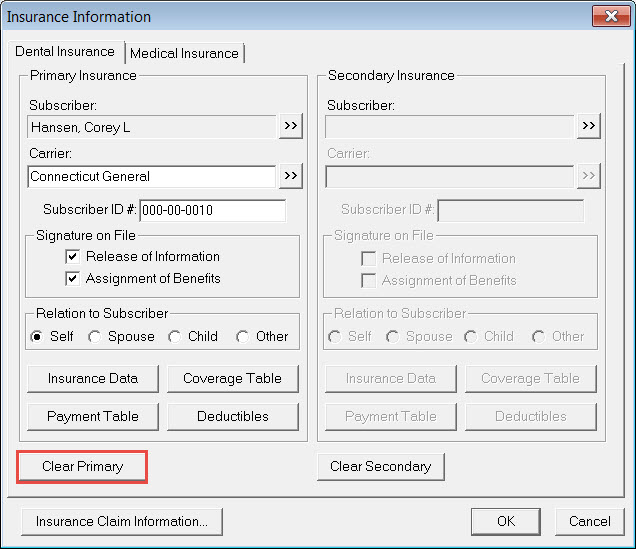
- Double-click the Insurance block to open the Insurance Information dialog box.
-
Click the Clear Primary (or Clear Secondary) button, and click OK.
- Repeat these steps for all patients attached to the insurance plan you want to purge.
-
Run the Insurance Aging Report:
- From the Office Manager, click Reports > Ledger > Insurance Aging Report.
- Search for outstanding insurance claims by entering a range of carriers (the one(s) you want to delete) from the Select Insurance Carrier group box, and click OK.
- View or print the report to see if there are any claims outstanding for the insurance plan. If there are outstanding claims, you must wait until the claims have been paid to purge the insurance plan.
-
Once you have cleared the insurance plan attached to patients and made sure all outstanding claims have been paid, you can delete the insurance plan using the Purge Dental Insurance Plans utility:
-
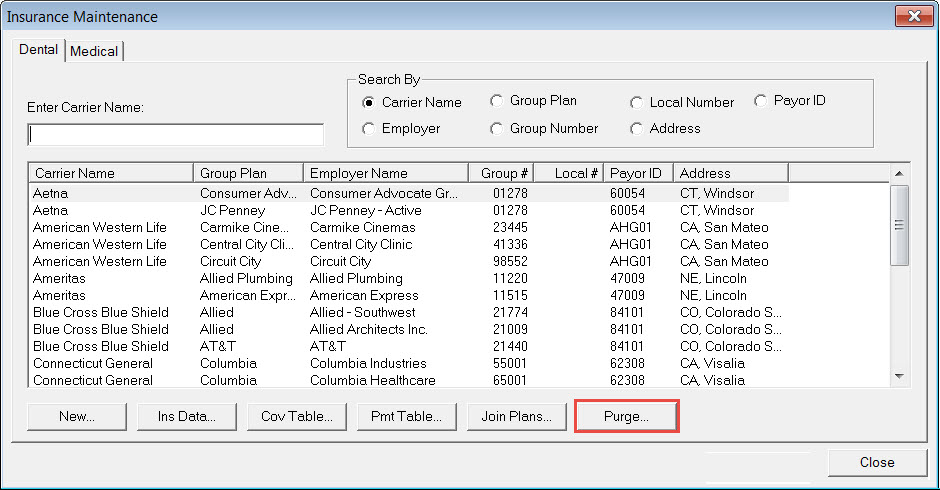
From the Office Manager, click Maintenance > Reference > Insurance Maintenance.
-
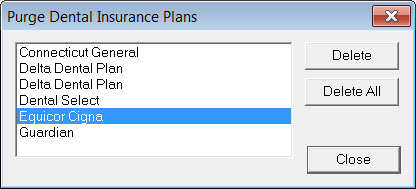
Click the Purge button to open the Purge Dental Insurance Plans dialog box.
Note: Insurance plans do not appear in the Purge Dental Insurance Plans dialog box if there are patients attached to the plan or if there are outstanding claims attached to the plan. If you are expecting an insurance plan to be on this list, but it isn’t, refer back to steps 1–3 above.
-
Do one of the following:
- To delete a single carrier, select the carrier and click Delete.
- To delete all the listed carriers, click Delete All.
- A warning message appears, asking you to confirm the deletion of the selected plan(s). Click OK.
- Click Close to return to the Insurance Maintenance dialog box.
-
From the Office Manager, click Maintenance > Reference > Insurance Maintenance.
Cleaning up your Dentrix database to make sure you aren’t storing duplicate, outdated or incorrect information will simplify your work. This article is about deleting unused insurance plans; if you want additional information about insurance maintenance, see the various topics listed under Insurance Maintenance Overview in the Dentrix Help.
Author: Joel Baldwin / Curriculum Development Supervisor
Published: 02/28/2017

 Contact Us
 Phone:
  Email
Email Request Demo