Tips from New Accounts Receivable Workshop
Coming this fall, the new Accounts Receivable Management Workshop offers a full day of hands-on training to help you take control of your patient accounts receivable. Learn to simplify your billing statement process and generate important A/R reports that will help you monitor the effectiveness of your collections efforts and track the effect of outstanding balances and adjustments. Here are a few of the tips that are included in this in-depth workshop.
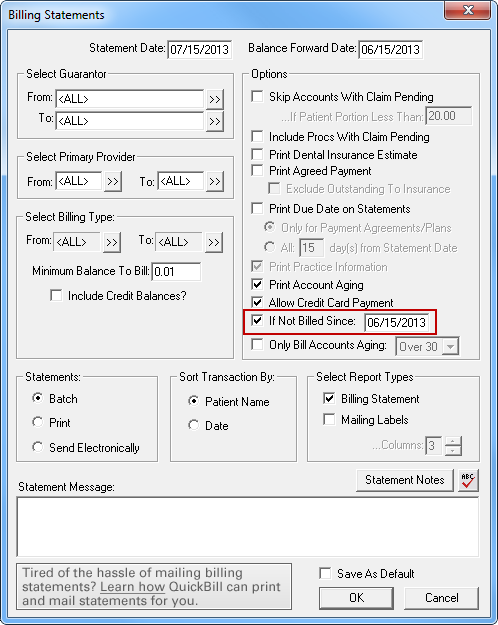
Using the "If Not Billed Since" Option with a Shorter Billing Cycle
One of the lesser-known features on the Billing Statements dialog box is the If Not Billed Since option. Use this feature to adjust your billing cycle so you are sending statements more frequently, in smaller batches. This is a great way to reduce the flood of phone calls that follows a big statement mailing. It will also even out your cash flow and make sending each batch of statements more manageable. You could send statements weekly, twice a week or even daily. To do so, you would just change the date in the If Not Billed Since field to the date of the last time you created billing statements.
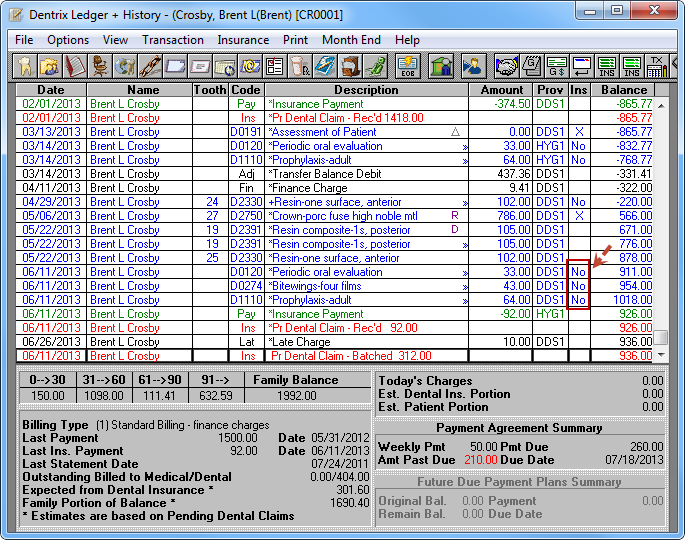
Understanding the Ledger Display
Did you know that when you see the word "No" in the Ins (insurance) column in the Ledger it means that procedure has not been billed to insurance? If you see the word “No” in that column and the patient was eligible for insurance at the time of service, Dentrix is telling you that this procedure was never billed to insurance, so you won’t receive payment for it.
Using the Search Payments Feature
Have you ever found a check in a drawer and had to figure out which patient it was applied to? Or needed to generate a list of all the credit card payments from a certain day so you can verify them? The Search Payments utility allows you to search by check information, date, insurance carrier, payment type, amount or guarantor to find specific payments that have been posted to the Ledger.
For example, to search by check number, go to the Ledger and click File > Search Payments. In the Search Payments dialog box, enter the check number and any other search criteria you want to use.
Note: You can combine several search criteria to narrow the search results.
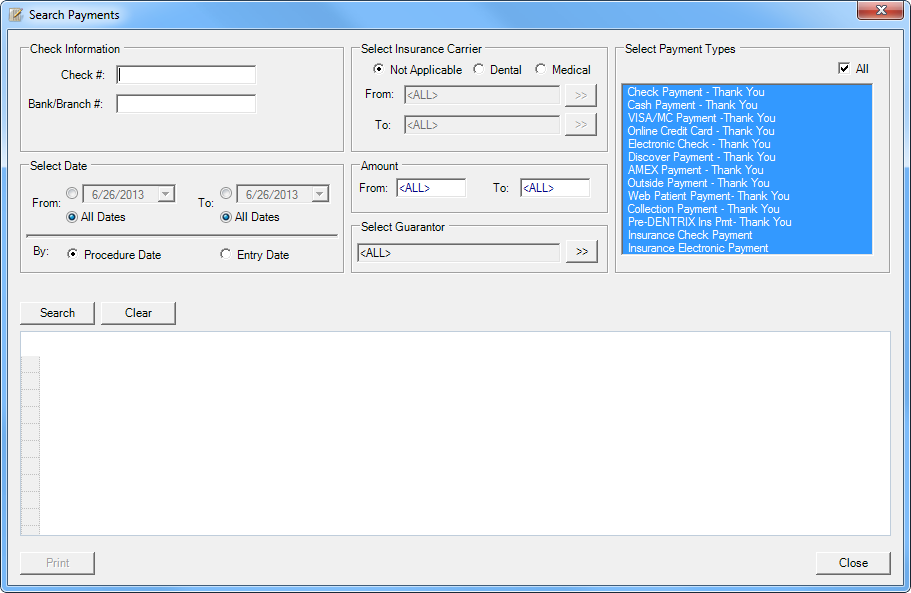
Click Search. Double-click any payment listed to open the Ledger for that patient so you can view the payment in more detail. Click the Print button if you want to print the results.
Get more tips like these that will help you understand how to take control of your patient accounts receivables at the Accounts Receivable Management Workshop! Classes start in early September. For a detailed course outline and a list of dates and locations, visit //www.dentrix.com/training/workshops/.
Author: Patty Reay
Published: 07/31/2013

 Contact Us
 Phone:
  Email
Email Request Demo