Keep Patients from Falling Through the Cracks
It’s a new year! This may be the perfect time to do a little spring cleaning and organizing. You can start by evaluating the different continuing care types you have been using. Are there types that aren’t working for your practice? Or do you have types that you just aren’t using? If so, then you may want to clean up those continuing care types.
The best thing to do in these situations is to delete the type you aren’t going to use anymore, so patients don’t get added to it. The tricky part is that you can only delete a continuing care type if it is no longer attached to patients. To find patients attached to a type you want to delete, you’ll need to generate a temporary view of the continuing care list. You can then clear the “to be deleted” type from patients on the list.
To create a temporary continuing care view:
- From the Appointment Book, click the Continuing Care button to open the Continuing Care module.
- From the Continuing Care module, click Views > Temporary View.
- From the Temporary Continuing Care View dialog box, select the continuing care type you want the list to include (the one you want to delete) from the drop-down options and select the With CC option.
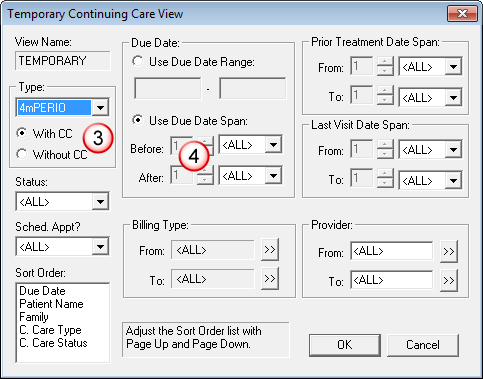
- In the Use Due Date Span group box, the increments should all be set to <ALL> to <ALL>.
- Make sure that all other filters are set to <ALL>.
- Click OK to load the temporary view.

To clear a continuing care type from a patient on the list:
- Click a patient’s name on the list and click Edit > Clear Selected Continuing Care.
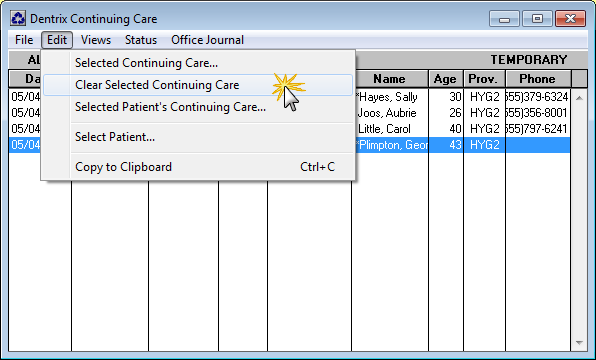
- Click Yes to confirm that you want to clear the continuing care type.
- Repeat steps 1 and 2 for all patients on the list.

Note: This process only works for active patients assigned to the continuing care type you want to delete. If there are non-patients or inactive patients assigned to the type, you will have to use letter merge search filters to find those patients attached the continuing care type, and clear it before you can delete the type.
Once the continuing care type no longer has patients attached to it, you can delete it. To delete a continuing care type:
- In the Office Manager, from the Maintenance menu, select Practice Setup > Continuing Care > Continuing Care Setup.
- Select the continuing care type that you want to delete.
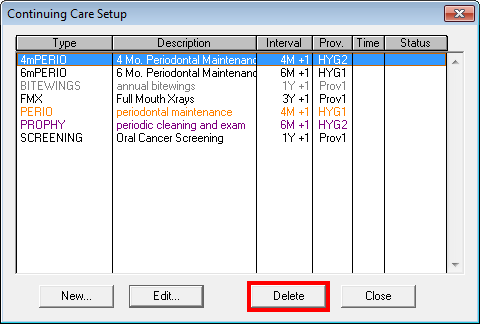
- Click Delete.
- Click Yes to confirm that you want to delete the continuing care type.

Now you no longer have to worry that patients will be attached to a continuing care type you are no longer using, which will help keep patients from falling through the cracks and make tracking which patients are due for continuing care more efficient.
For more information about setting up continuing care types, see the "Continuing Care setup," "Adding continuing care types", and "Editing continuing care types" topics in the Dentrix Help.
Author: Sean Eyring
Published: 01/31/2014

 Contact Us
 Phone:
  Email
Email Request Demo