Creating Insurance Claim Remark Templates
Did you know you can create templates for frequently used claim remarks or narratives that the doctor has to write? By creating these templates, when you're adding remarks to insurance claims, you can add the templates to the claim remarks instead of rewriting, or making the doctor rewrite, the narrative.
To create a claim remark template:
- From the Office Manager, click Maintenance > Practice Setup > Custom Notes > Claim Remarks Setup. The Custom Claim Remarks Setup dialog box appears.
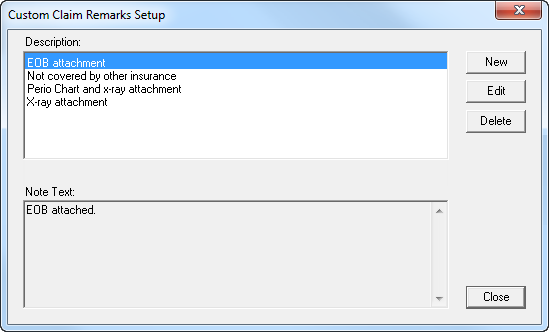
- Click New. The New Custom Claim Remark dialog box appears.

- In the Description field, enter a description for the claim remark.
- In the Note field, enter a brief claim remark (only 101 characters will print on the insurance claim, and only 125 characters will be sent on an electronic claim). If desired, click the spell check button to check the spelling of the note.
Note: You'll be able to edit the template on a per-patient basis, so don't include specific tooth numbers or surface information in the template you create. - Click OK.


Once you have created a claim remark template, it is easy to attach it to an insurance claim:
- From the Ledger, double-click an insurance claim. The Primary Dental Insurance Claim window appears.
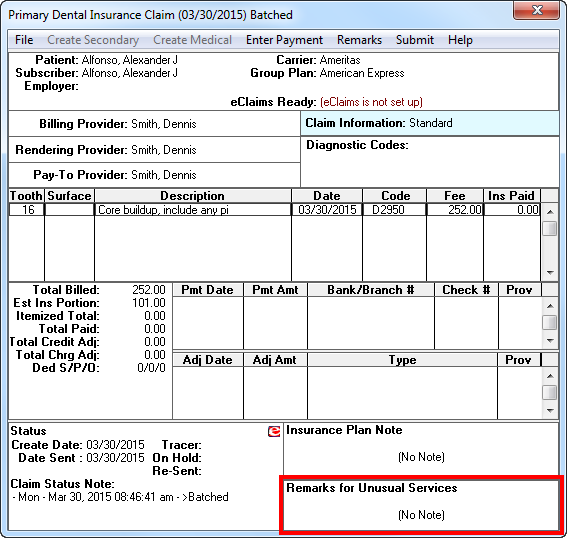
- Double-click the Remarks for Unusual Services block. The Remarks for Unusual Services dialog box appears.
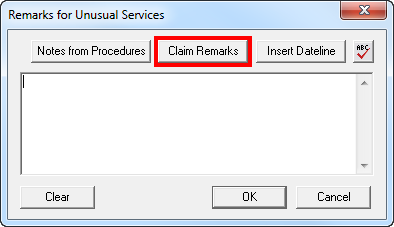
- To enter a claim remark from a template you created previously, click the Claim Remarks button. The Insert Custom Claim Remark dialog box appears.
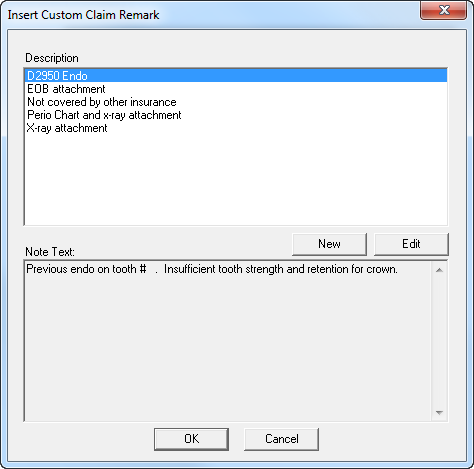
- In the Description box, select the remark that you want to add to the claim and click OK to return to the Remarks for Unusual Services dialog box.
- In the Remarks for Unusual Services dialog box, you can edit the note template with specific patient information such as tooth number and/or surface information.

Once you have entered this information, click OK. The Remarks for Unusual Services block of the insurance claim now contains this information. - Submit the claim as you normally would.


For more information about processing, tracking and receiving insurance claims, attend the Insurance: Billing and Collections workshop in a city near you.
Author: Sean Eyring, Curriculum Development Specialist
Published: 04/30/2015

 Contact Us
 Phone:
  Email
Email Request Demo